Login Azure AD B2C User with Postman
Recently a customer asked how to load test a web application that uses Azure AD B2C (OpenIdConnect) for authentication. Even though there are lots of articles on calling Web APIs with OAuth tokens, I could not find much info on automating the OpenIdConnect authentication flow.
I thought that if I could execute the correct requests in Postman I should be able to create an automated web/load test.
Problem: Azure AD B2C login pages rely on Javascript. Postman (and most load testing frameworks like JMeter) do not run client-side Javascript.
In order to get around this, you need to "fake" the functionality of the Javascript code to create the subsequent requests.
Lets break down the auth flow into 5 steps, and outline how to craft the request in Postman. Specifically, I want to test a "username and password" type B2C user, not a "social login (MS Live, Google, Facebook)" type user.
Note: This article is based on the Azure AD B2C ASP.NET Core Web App Sample on Github, as of Nov 2019. To setup the sample just clone the repo, execute
dotnet run, and sign up a new user.
Step 1: Initial GET Request
First, turn off auto-redirect and send an initial GET request to your site root or signin route.
1 | GET http://localhost:5000/Session/SignIn |
The response should have a Location header with the full URL and query string for the Authorize request.
Specifically, we are interested in the state and nonce values, which will be different each time.
Step 2: AAD Authorize Request
If you grab the Location redirect header from the previous step it should look like this
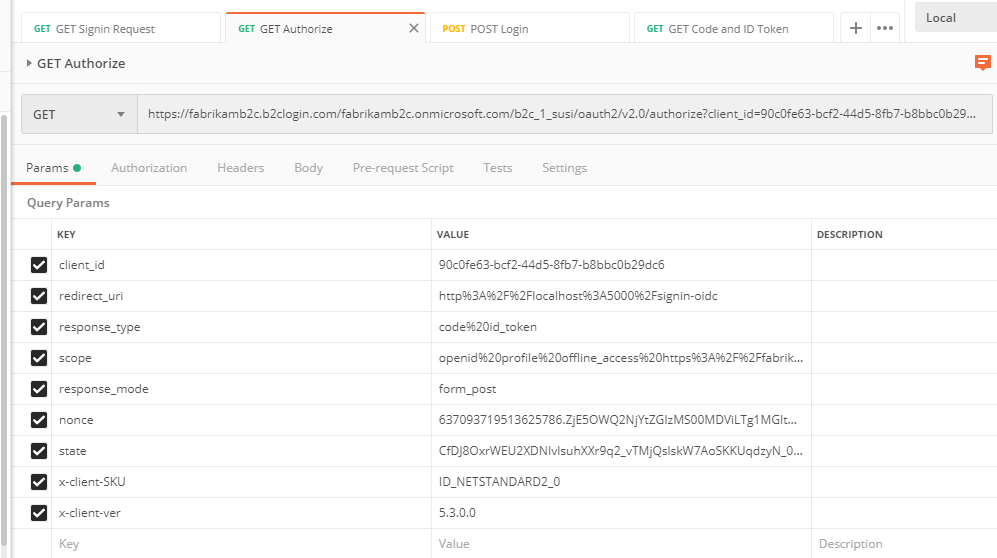
While some information may be different based on your application, the following should be standard for OpenIdConnect
- response_type is "code id_token"
- scope includes "openid"
The response_mode is important to note, this will setup the flow to send the code back to your application using either a query string or form post mechanism.
When you execute this request you should get a 200 OK response, even though the content will say that you need Javascript to continue.

Don't panic. It did work as expected.
From here we need to extract some information from the body of the response, which I will outline in the next step.
Step 3: Login Request
To build the Login request and pass the username+password, we need some information from the body of the Authorize request.
Scroll down in Postman until you find var SETTINGS = { ... in a <script> tag.
Copy the csrf and transId values from the SETTINGS JSON object.

You can add them to the Postman environment or global variables, so in the future I will refer to these values with csrf and transId
Create a new POST request with this url and header
1 | POST https://fabrikamb2c.b2clogin.com/fabrikamb2c.onmicrosoft.com/B2C_1_SUSI/SelfAsserted?tx={{transId}}&p=B2C_1_SUSI |
Note that B2C_1_SUSI is the policy name defined in B2C for the "sign-in sign up" auth flow, this may be different for your application.
In the message body, set to x-www-form-urlencoded and enter the following info.
- request_type RESPONSE
- logonIdentifier
- password
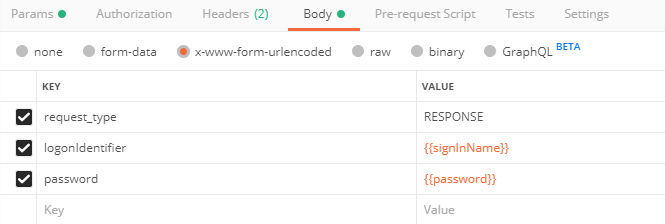
Note: The logonIdentifier key is configurable in the B2C policy. This may be a different key like "signInName" or "emailAddress" depending on your configuration. Fiddler is your friend here.
Once you execute this request you should receive a 200 OK with the following response body:
1 | { |
This response also set cookies in Postman which means that other requests are authenticated. Which is important for the next step.
Step 4: Generate Auth code and ID Token
This is fairly straight forward. Now that the session is authenticated we need to request the code and id_token.
Create a new request with the following URL
1 | https://fabrikamb2c.b2clogin.com/fabrikamb2c.onmicrosoft.com/B2C_1_SUSI/api/CombinedSigninAndSignup/confirmed?csrf_token={{csrf}}&tx={{tx}}&p=B2C_1_SUSI |
Note: CombinedSigninAndSignup is the name of the configured flow in Azure AD B2C, if you are using a different flow you will need to change this url. Again, try it yourself, Fiddler is your friend here.
If in Step 2 you used form_post as the response_mode you should recieve a basic HTML site with a form and hidden fields state, code, id_token, and maybe a few others.
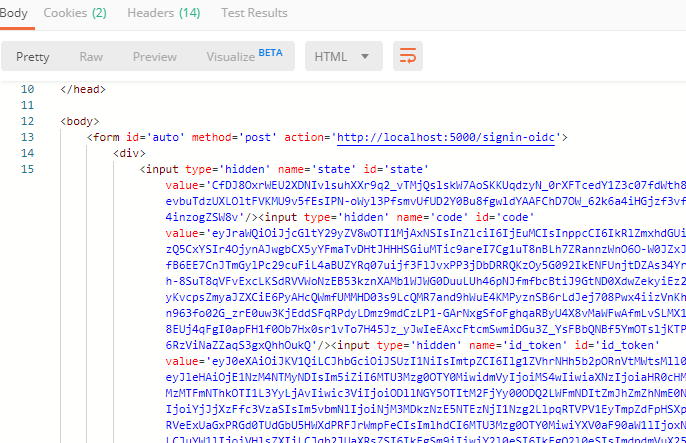
Copy the state, code, and id_token values.
Step 5: POST Request to site
Finally, create a POST request to your site with the state, code, and id_token values in x-www-form-urlencoded
1 | POST http://localhost:5000/signin-oidc |
At this point you should be able to load your site as an authenticated user.
If you are getting Correlation failed errors, the state value does not match an existing OpenIdConnect cookie, you may need to restart the process with an initial Login request to reset the proper cookies, and use the new state though the authentication process.
The good news is that once you have the B2C auth cookie, the /authorize request will return the state, code, and id_token values in form post HTML.
I hope this helps you run end-to-end web tests on your B2C site!
Mileage may vary: As you can tell, B2C is a highly configurable solution, this article is based on the .NET Core B2C sample found here. Your app will likely have a different configuration. Use Fiddler to capture a login flow and use that as a guide.
